Well my sweet little "A" is going to be 7! And well Frozen is her favourite movie right now along with millions of other children, it is really hard to find Frozen dress up clothes. Disney store is sold out or only has little sizes. Walmart had some but it only fits 4-6x, which may have fit if she was wearing only that. So I searched the Internet and Etsy seeing if u could score one online and have it delivered by her birthday. Now I'm cheap so I didn't want to spend more then $40 on a dress up outfit. No luck!
I have next to NO sewing skills....I might be able to sew on a button and have it stay on for a few hours, MAYBE! But with a little coaching from my mom said "Why don't you make it! Or find a blue kids skirt or dress." Duh, why didn't I think of that!! So I headed out to our value village and goodwill store and found a plain black tank top, but no kids skirt. I did however find a women's blue skirt which is the perfect shade of blue for the costume, but it was a plus size skirt. And well I do not have a sewing machine and no back ground in sewing!
Sorry for the crappy photos, taking with my phone. And my messy house....well that's another story!
I laid out the pieces, getting an idea on what it's going to look like!
I cut open the skirt to re-size it.
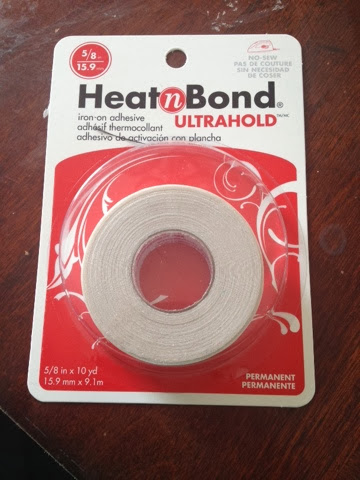
With some heat n bond iron on adhesive I attached the seam back together.
I re-sized the skirt to be a little bit bigger then the bottom of the shirt, both are stretchy material!
I pinned the top and skirt together and pinned a ribbon around to see what it was going to look like. Now I could have left it as a skirt and top which would have been cute and easy!! But she really wanted a dress and she also wouldn't let me cut any length off. Can you say DIVA...but it's her choice, she is going to be wearing it not me!! She also tried it on with jeans and long sleeve shirt underneath. So it will fit big.
If attaching the two pieces together then while everything is pinned, turn outfit inside out. Before sewing I used this much heat-n-bond on the front, back and both sides (I did cut off some length of the tank top so that the skirt would fit higher up). I just used this so that it wouldn't move around so much after I had my seams lined up.
Then just do a basic line stitch...I think that's what it is called. I honestly YouTube how to sew a sturdy stitch and watched 2 videos. I'll post a link to which videos I watched at bottom of this post.
It doesn't have to look pretty or professional because you are just going to be covering it up with a ribbon. So even if you see the stitching on the other side of the dress don't worry!!
For the design on the front of Anna's dress I used iron on patches, I was going to use felt and fabric glue it on but I want to be able to wash it (since she will probably be living in it) and I have no idea how well felt holds up if it gets wet.
This is the iron on patches we used to cut and place on the front of the dress.
Husbands are great for this part!! :)
After everything was all ironed on, measure out how much ribbon you will need to use. I put this on loose so that the waist didn't get any tighter and then it would be harder to put on.
Instead of sewing or using the heat bond, I used this fabric tape.
TAH-DA! She loves this dress to pieces and is more proud to wear it then all her other costumes. Now because of the material and the length of the dress she couldn't walk very fast in it, so I had to put a slit in it for more movement.
Not a very pretty looking slit and hem...but then again this is my very first project and who cares what the inside looks like.
Add a few stitches to the top of the slit so that it doesn't rip even further.
The Hubby made some extra flowers out of the material and I added them to the bottom of the dress in random places. Since I'm such an amazing photographer (NOT) I never noticed that I captured my lovely socks in the pic. LOL!
The final piece!! YAY!
Letting her play in it before deciding to add those extra flowers...
Hope you enjoy this post, have fun!
Now do you wanna build a snowman?
XXOO Lacey and "Anna".


.jpg)


.jpg)


